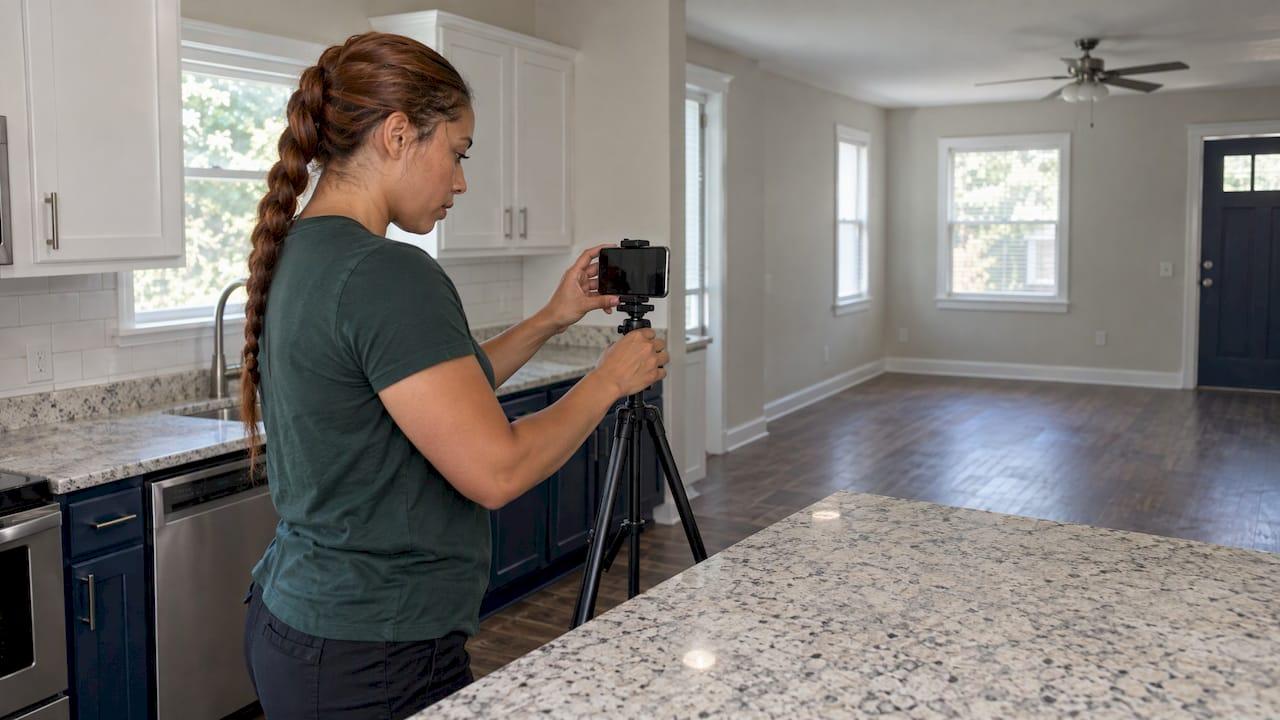
Good rental listing photos are bright, level, honest and complete: 10 to 20 horizontal shots, taken in daylight after the unit is cleaned and decluttered, led by your strongest image. A phone is enough if you control light and angles. The photos are also the part of vacancy marketing where most landlords lose days. As a full-service management team in Atlanta, we treat the photo set as the first step of filling a unit, not an afterthought.
TL;DR
- Shoot 10 to 20 horizontal, full-color photos: exterior, living area, kitchen, every bedroom and bathroom, plus parking, laundry and outdoor space.
- Prep first. Replace dead bulbs, patch nail holes, clear counters and cords, and clean. Photos expose every flaw.
- Use daylight, lights on, flash off, camera at about waist to chest height, and straight vertical lines.
- Occupied unit? Give tenants written notice and a short checklist. Vacant unit? Add light staging so rooms show scale.
- Landlords usually pay for their own listing photos. A pro shoot typically runs $100 to $500, and a phone shoot costs nothing but time.
Table of Contents
- Why the photos decide who calls
- Prepare the unit before you pick up the camera
- The shot list: what to photograph and how many
- Camera, phone and lighting: what actually matters
- Photographing a vacant unit
- Photographing an occupied unit
- Who pays for rental listing photos, and what do they cost?
- Common mistakes that cost you applicants
- Let us handle the vacancy for you
- FAQ
- Sources
Why the photos decide who calls
Renters scroll. Before they read a word of your description, they judge the lead image and the next four or five. A weak or confusing first photo costs you the click, and nothing below it gets a chance. That is why the first five images should tell one coherent story: the exterior or your best room, then the living space, kitchen, bedroom and bathroom.
Photos also screen for you. Honest, clear images bring tenants who have already decided the unit fits their needs, so showings are shorter and more of them lead to applications. Misleading images, such as an ultra-wide lens that doubles the apparent room size, bring tenants who walk in, feel misled and walk out. That wastes your time and extends vacancy.
Vacancy is where the money goes. Every empty week is a week of lost rent and carrying costs, so a few hours spent on photos is cheap against that. Our guide to filling a vacancy fast covers the whole marketing sequence. This article covers the photo part in detail.
Prepare the unit before you pick up the camera
Most of what makes a rental photo look professional happens before the shoot. Work through this list room by room:
- Deep clean. Kitchen surfaces, bathroom grout, mirrors, windows and floors. Dust and smudges show up under bright light.
- Fix the small things. Replace burnt bulbs (and match the color temperature across the room), patch nail holes, touch up scuffed paint, tighten loose cabinet pulls.
- Clear the clutter. Remove trash cans, cords, countertop appliances, magnets and papers on the fridge, and toiletries in bathrooms.
- Open the space. Open blinds and curtains, turn on every light, and move vehicles out of the driveway for exterior shots.
- Stage lightly if empty. One or two simple anchors, such as a throw pillow, a plant or a small table, are enough.
If the unit has just turned over, the same work doubles as your make-ready. This apartment turnover checklist walks through it room by room, and our own make ready checklist covers what owners and tenants each need to handle. Shoot only after the unit passes both.
One more point: photos you take at move-out for inspection purposes are a different job from listing photos. Those are about documenting condition, and we explain the difference in our post on timestamped move-out inspection photos.
The shot list: what to photograph and how many
Aim for 10 to 20 images. One- and two-bedroom units usually need 10 to 15. Larger single-family rentals in Atlanta suburbs such as Marietta, Alpharetta or Johns Creek often need closer to 20, because there are more rooms and more outdoor space to show.
| Area | Shots | What to capture |
|---|---|---|
| Exterior / entrance | 1–2 | Front of the building or house in good light, clean walkway, no parked cars |
| Living room | 2–4 | Wide shot from the entrance and one from the opposite corner |
| Kitchen | 2–4 | One wide shot, one of the appliances or best feature (new counters, gas range, pantry) |
| Each bedroom | 1–2 | Wide shot that includes the closet |
| Each bathroom | 1–2 | Straight on from the doorway, tub or shower visible |
| Laundry, storage, parking | 1–3 | Washer/dryer hookups or units, garage or driveway |
| Outdoor space, shared areas | 1–3 | Patio, deck, yard, pool or gym if it is included |
| View | 1 | Only if the window view is a real selling point |
This range matches what rental platforms recommend: at least 10 to 15 high-quality photos, each focused on one key feature, with wider shots for context and a few different angles. In each room, decide what you want the renter to remember (the big window, the updated counters, the walk-in closet) and frame for that, rather than cramming everything into one shot.
Order matters
Upload in the order a renter would walk the unit: lead image, living area, kitchen, primary bedroom, bathroom, secondary rooms, extras, then exterior or parking if the exterior was not first. Put the best image first. Our post on rental listing syndication explains how the same set then travels across multiple sites, so the order you choose once is the order renters see everywhere.

Camera, phone and lighting: what actually matters
Use the phone you have
A modern smartphone is enough for rental photos. What separates good from bad is technique:
- Hold it horizontally. Landscape images fill the screen on listing sites and show more of the room.
- Turn on the grid. Use it to keep walls and door frames vertical. Tilted verticals are the quickest giveaway of an amateur shoot.
- Start with the standard 1x lens. Switch to ultra-wide only for small rooms such as bathrooms and galley kitchens, and avoid so much distortion that the room looks fish-eyed.
- Leave the flash off. It flattens the room and creates hot spots on tile and glass. Keep HDR on.
- Tap to set exposure. Tap an area inside the room, not the bright window, so the room does not go dark.
- Use the highest resolution, skip filters. Renters feel cheated by heavy editing when they arrive.
Height and position
Shoot from about waist to chest height, or just above countertop height in the kitchen, so verticals stay straight and proportions stay natural. Stand in a corner so you can show two walls in the frame and give the room depth. Eye height of about 5 to 6 feet also works as long as you keep the camera level and do not tilt it down.
Light
Daylight is your best tool. Shoot when the main living area gets natural light: usually mid-morning for east-facing rooms and late afternoon for west-facing ones. Direct midday sun can blow out a shot and wash out the color, so use blinds and curtains to shape it, then turn on fixtures to fill any dark corners. In Atlanta, summer afternoon sun can be harsh, and cloudy winter days can be dim, so check the room before you commit to a time.

Gear worth buying
If you shoot several units a year, a few accessories help. Typical prices run about $25 to $50 for a phone tripod with a remote, $30 to $100 for a clip-on wide-angle lens, $40 to $80 for a portable LED panel and $8 to $15 for a lens cleaning kit, according to this equipment cost breakdown. A dedicated mirrorless or DSLR camera is $500 to $2,000 or more, and it is not needed for a one-bedroom rental.
File specs
Most sites want horizontal, full-color JPG or PNG files. A 16:9 ratio at 1920 by 1080 pixels is a safe target, under about 6 MB per file, per one host-platform guide. Another large platform asks for at least 1200 by 800 pixels and files up to about 10 MB, per its photography guide. Export one high-resolution set and you will fit nearly every site.
Photographing a vacant unit
Empty rooms are harder than they look. Bare walls and floors bounce light unpredictably, and without furniture to give scale, a living room can look cavernous or oddly shaped. Professional photographers describe using off-camera flash, diffusers and bracketed exposures to handle this, and renters struggle to judge size without anchor points.
You do not need that gear for a standard rental. You need:
- Anchors. A pillow, a lamp, a small plant, a TV on a stand or a vase of flowers. Empty spaces look smaller and less inviting, and a couple of items fix that.
- Consistent bulbs. One warm bulb in a row of cool ones is obvious in a photo.
- Clean floors. Bare floors catch every scuff and footprint.
- Honest framing. Show the real room. If a photo needs an ultra-wide lens to make a room look usable, the room will disappoint at the showing.
Virtual staging is an option when you do not want to place anything physically. If you use it, label the images clearly so renters know what is real.
Photographing an occupied unit
When a tenant is still living in the home, the photo shoot is a request, not a right. Give written notice, and treat consent as best practice. Many states require 24 to 48 hours' written notice before entry for showings or media, and your lease sets the terms for your property. Whatever the lease allows, give at least 24 hours and a clear checklist so the tenant knows what to do.
A short tenant checklist works well:
- Clear kitchen counters and the fridge door.
- Make beds and fluff pillows on sofas.
- Remove toiletries from bathrooms.
- Turn on all interior lights and open blinds.
- Move cars out of the driveway.
- Put away personal items.
Keep the tenant's privacy intact. Photos should not include faces, family photos, medical items, mail or identifying documents. Check every frame before you upload, including reflections in mirrors and windows.
The same notice-and-checklist approach carries into showings. Our guide to tenant placement in one to four weeks explains how photos, showings and screening fit together on one timeline.
Who pays for rental listing photos, and what do they cost?
Landlords generally pay for their own rental photos, since there is no sales commission to fund them. Professional real estate photography typically costs $100 to $500 per session: about $150 to $250 for a 1,200 square foot condo and $350 to $500 for a 4,000 square foot home. Prices vary by city. One guide puts professional shoots at $100 to well over $1,000, with Orlando, Dallas and Charlotte near $300 and West Coast cities above $500. Multi-unit and apartment-building shoots cost more: one pricing guide lists $550 to $5,000 or more per building, with video tours adding $300 to $800.
The same guide frames cost the useful way: per lease. A shoot that costs more but fills units in 30 days is cheaper than a bargain shoot that leaves a unit empty for 90. Photos also keep working. A set can power every channel for 12 to 24 months, so you shoot once and reuse it, as long as the unit's condition has not changed.
For a single unit, a careful phone shoot following the steps above is a sound choice. For a higher-rent home or several units, a professional set is a reasonable line item in your vacancy budget.
Common mistakes that cost you applicants
- Dark rooms. Lights off, curtains closed. Fix it by turning everything on and shooting in daylight.
- Crooked verticals. Tilted walls make rooms look smaller. Use the grid.
- Photos of clutter. Cords, trash cans and personal items distract from the unit.
- Missing rooms. If a renter cannot see the bathroom or the laundry, they assume the worst or skip the listing.
- Too few photos. One or two images signal that something is wrong.
- Stale photos. Winter photos in July, or a set from a previous tenant's furniture layout, confuse renters.
- Overedited images. Heavy filters and distorted lenses lead to unhappy showings.
Once your set is ready, pair it with a clear description. Our rental listing description ideas show how to write copy that matches what the photos promise. The photos and text should answer the same questions: size, light, condition and what is included.
Our view: photos are the first step of tenant screening
We see listing photos as more than decoration. They are the first filter in the whole leasing process. Honest, well-lit photos set accurate expectations, and accurate expectations bring tenants who want the unit you actually have.
That is why we handle vacancy marketing as part of full-service management. Owners who work with us get a team that coordinates the make-ready, the marketing, tenant screening, placement and lease drafting as one connected process, with transparent pricing. Photos are where that process starts, and they set the tone for everything after.
For investors, the goal is simple: shorten the gap between one tenant leaving and the next lease starting, with a tenant who is a good fit. A tidy, well-photographed unit helps with the first part, and a clear screening process helps with the second.
Matt
Let us handle the vacancy for you
If you own rental property in Atlanta, Marietta, Alpharetta, Johns Creek, Powder Springs, Austell or nearby, you do not have to run the shoot, the listings and the showings yourself. Our property management service covers vacancy marketing, tenant screening and placement, lease drafting and renewals, rent collection, maintenance coordination and financial reporting. Monthly management is 10% per month, with a $250 one-off onboarding fee, a $500 lease renewal fee and an optional Owner Benefit Package at $40 per month per unit. See the details on our property management page.

If you are weighing whether a rental fits your portfolio, our investment consulting sessions are a $300 30-minute call or a $500 60-minute deep dive.
FAQ
How many photos should a rental listing have?
Aim for 10 to 20. Ten to 15 is usually enough for a one- or two-bedroom unit, and larger homes benefit from up to 20. Cover every room plus parking, laundry and outdoor space, and avoid near-duplicate shots.
Can I take rental listing photos with my phone?
Yes. Hold the phone horizontally, turn on the grid, use the standard lens first, keep the flash off and shoot in daylight with every light on. Clean and declutter first, because that matters more than the camera.
What should the first photo in a rental listing be?
Use your strongest image: a well-lit exterior or the best room, usually the living area. The first five photos should read like a walk-through, from the lead image to the living space, kitchen, bedroom and bathroom.
Who pays for rental listing photos?
The landlord typically pays, since there is no sales commission involved. A professional shoot commonly costs $100 to $500 per session, depending on the size of the home and the city. Doing it yourself with a phone costs only your time.
Do I need my tenant's permission to photograph an occupied rental?
Give written notice and get their agreement. Many states require 24 to 48 hours' notice for entry, and your lease sets the terms. Give a short checklist and keep faces, family photos, mail and documents out of every frame.
Sources
- Photography Tips for Your Rental Listing
- Rental Property Photography Tips
- How to improve the quality of your listing photos
- How to take great photos for your listing
- Vacant vs. Occupied Rental Property Photography
- What Happens If the Property Is Occupied During the Shoot?
- Do Realtors Pay for Photography?
- Who Pays for Real Estate Photos?
- Apartment Photography Cost