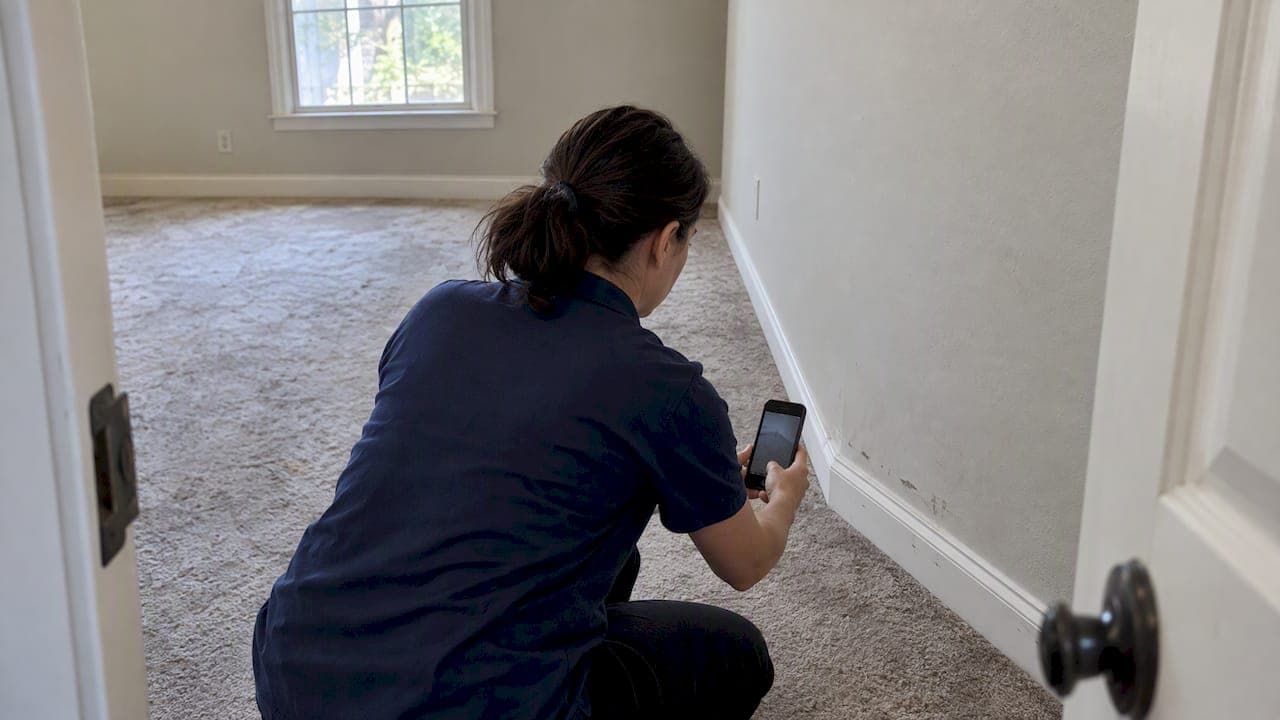
A move out inspection is the documented, room-by-room comparison of a rental's condition against its move-in record, and it is the basis for security-deposit deductions. Before you hand over the keys, photograph every room and sign a dated checklist. Anchor your records to a standard form like the HUD sample inspection form, your state statute, and a consistent process like ours at OneSource Real Estate.
TL;DR:
- Request a walkthrough soon after giving notice, target roughly two weeks before the lease ends where local law permits, and confirm notice requirements before scheduling.
- After cleaning and removing belongings, photograph every room, including closets, cabinets, and appliances, and preserve the original timestamps before surrendering the keys.
- Use matching dated, signed checklists at the start and end of tenancy, and support deductions with photos, invoices, and evidence separating damage from ordinary wear.
- Check state and city rules before the inspection because notice periods, chances to remedy defects, and deposit accounting requirements vary by location.
- Separate ordinary aging from damage you caused; report preexisting leaks in writing, and keep receipts for urgent repairs or work you complete.
Table of Contents
- What does a move-out inspection actually involve?
- When should you request a pre-move-out walkthrough?
- How should tenants prepare before the walkthrough?
- What evidence should you collect and how should you store it?
- What do statutes and local rules commonly require?
- Which red flags trigger deductions, and how do you handle them?
- What should a room-by-room checklist cover?
- Why consistent records prevent most deposit disputes
- How we handle move-out inspections for landlords
- FAQ
- Sources
What does a move-out inspection actually involve?
Think of it as the final measurement of the same asset you measured on day one. The inspector walks each room, compares what they see to the move-in report, and records differences. It is different from a home-sale inspection, which evaluates a building's systems for a buyer, and from a routine mid-lease inspection, which checks upkeep. Here the only question is what changed since the tenant moved in, and why.
Usually the tenant and the landlord or property manager attend together. Sometimes a third-party inspector joins, especially for larger properties or when a dispute is likely. The HUD form shows how this works in practice: condition is recorded room by room, with fields where the manager and the resident can each note agreement or disagreement and sign.
The walkthrough produces three outcomes: a cleaning and repair list, evidence for any deposit deductions, and the information the owner needs to plan turnover and get the unit ready for the next household.

When should you request a pre-move-out walkthrough?
Ask early. A walkthrough only helps if you still have time to fix what it finds, so request it as soon as you have given notice, and aim for roughly two weeks before the lease ends where your jurisdiction allows it. Put the request in writing and agree on a date that suits both sides. Some places require the landlord to give written notice of the inspection, so check your local rules before assuming either party can simply show up.
Rules differ widely, which is why examples help. California treats an initial inspection before move-out as an optional step a tenant can request. Minnesota's statute on move-out inspections states that the purpose is to give the tenant an opportunity to remedy identified deficiencies. Pasadena's rent stabilization guidance says the owner must tell the tenant about the right to request an inspection, which should take place before the tenancy ends.
Treat these as illustrations, not universal law. Confirm what applies to your address.

How should tenants prepare before the walkthrough?
Work through this list in order, starting with the paperwork, because the lease decides what "clean" and "repaired" mean in your case.
- Read your lease for notice periods, cleaning standards, alteration rules, key return, utilities, and deposit terms.
- Remove everything that belongs to you, including trash, food, and items left in closets, attics, or storage areas.
- Deep-clean the kitchen and bathrooms. Empty and wipe cabinets, clean the oven, refrigerator, and stovetop, scrub tubs and toilets, and wipe light fixtures.
- Vacuum carpets and mop hard floors once the furniture is gone, so you can see the whole surface.
- Fix small things you caused. Fill minor nail holes with spackle, replace burned-out bulbs, and tighten loose hardware.
- Return every key and access device and get a receipt or other proof of delivery.
- Give your forwarding address in writing and keep copies of everything you hand over, including repair receipts.
Pro Tip: Do your final cleaning last, then photograph the unit immediately. Dusty footprints from the movers will undo hours of work if you shoot first.
Ohio Legal Help's moving-out checklist reinforces the key return receipt and forwarding address, and notes that Ohio landlords must send the deposit or provide written information about deductions. If your unit has stale air or lingering odors, a vent cleaning guide like this move-out vent sanitation walkthrough can help you decide whether a professional visit is worthwhile. For a broader turnover task list, see our make ready checklist.
What evidence should you collect and how should you store it?
The inspection report is evidence, but attending it does not guarantee a full deposit refund, and a landlord should not treat it as permission for unsupported deductions. The strongest file is built from several pieces that agree with each other.
- Photos or video of every room, taken after cleaning and after belongings are gone, but before you surrender the keys.
- Inside closets, cabinets, and all appliances, since these are the spots people forget and landlords later dispute.
- Original files with their dates intact. Do not edit, crop, or rename in ways that strip timestamps; back them up to cloud storage and email a copy to yourself.
- A dated, signed move-out checklist, compared side by side with the move-in report.
- Repair estimates, invoices, and key-return receipts, plus any written notices exchanged.
Photograph the apartment after cleaning and after most belongings are removed, including inside closets, cabinets, and appliances, and keep the dated photos and videos before you close the door. This is the guidance in MassLegalHelp's moving-out checklist, and it describes a tenant's strongest last-minute evidence.
What do statutes and local rules commonly require?
Rules on notice before an inspection, opportunities to fix problems, and accounting for the deposit vary by jurisdiction. The exact numbers change by state and sometimes by city, so treat the examples below as a map of what to look for, not a rulebook.
Check Georgia's official guidance for the applicable move-out inspection and security-deposit procedures. Our overview of Georgia security deposit law goes deeper for local readers.
Elsewhere, the pattern shifts. Check California's official guidance for whether an initial inspection is available before move-out. Minnesota frames the inspection around the tenant's chance to remedy problems. Check Pasadena's local guidance for inspection notice and any information provided after the inspection.
Whatever your state, read its statute and any city ordinance before the walkthrough, not after the deposit letter arrives.
Which red flags trigger deductions, and how do you handle them?
Some defects draw attention fast. Safety and habitability problems, active leaks or water damage, missing fixtures or keys, broken windows or doors, large holes or burns, damaged flooring, pest evidence, and unauthorized alterations top the list.
- Document first. Photograph the problem from a few angles with a visible date.
- Make urgent safety repairs promptly and keep the receipt.
- Separate wear from damage. Faded paint after several years is ordinary aging; a gouge from furniture is not. Check the move-in record and the age of the item.
- Tell the landlord in writing about problems you did not cause, such as a slow leak, so they are not blamed on you later.
- Hire a pro when a DIY fix could make it worse, such as flooring or plumbing.
Pro Tip: Landlords, show your math. A deduction holds up when it explains why an item exceeds ordinary wear and charges only the reasonable, supported loss.
Repair duties also run both ways. Our guide to landlord repair responsibilities in Georgia explains which fixes belong to the owner.
What should a room-by-room checklist cover?
Use the same list for the tenant's photos and the landlord's report, so both records line up.
- Entry and locks: test every lock, confirm all keys and fobs, check the doorbell and peephole.
- Living area: walls, baseboards, outlets, switches, light fixtures, blinds.
- Kitchen: stove, oven, range hood, refrigerator, dishwasher, cabinets inside and out, countertops, sink and faucet.
- Bathrooms: toilet, tub or shower, grout and caulk, drains, water pressure, hot water, exhaust fan.
- Bedrooms and closets: doors, shelves, rods, flooring, and ceiling.
- Walls, floors, ceilings: note stains, holes, burns, and carpet wear.
- Windows and doors: glass, screens, latches, and weatherstripping.
- Smoke detectors: confirm they are present and working.
- Exterior: patio or balcony, mailbox, storage areas, and yard if included.
Photograph inside cabinets, appliances, and closets, and record meter readings where relevant. Routine fixes are cheap: spackle small holes, swap dead bulbs, and wipe down appliances. For landlords building a process, our post on routine rental inspections in Georgia offers templates.
Why consistent records prevent most deposit disputes
Most disputes are not about the carpet, they are about the paper trail. Treat move-in and move-out as two measurements of the same asset, keep both signed and dated, and use the same photo standards and templates for every unit. When a tenant gets a chance to fix an issue before leaving, and hears exactly what is expected, deductions shrink and arguments mostly disappear. A deduction you can tie to a photo and an invoice rarely becomes a fight.
How we handle move-out inspections for landlords
If you would rather not run turnover yourself, we do it for you. We coordinate the inspection, the make-ready work, and the deposit accounting so every deduction rests on a documented file.

- Move-out inspections with consistent room-by-room documentation
- Make-ready coordination and tenant placement for faster turnover
- Deposit accounting built on signed checklists and dated photos
See how our property management services work, then reach out to talk through your next vacancy.
FAQ
How do I prepare for a move-out inspection?
Read your lease, clean thoroughly, repair small damage you caused, and remove all belongings. Then photograph every room and return keys with a receipt.
What is the biggest red flag in a home inspection?
For a move-out, safety or habitability defects, active leaks, and water damage draw the most scrutiny. Document them and repair or report them before the walkthrough.
What are the requirements for a move-out inspection in California?
Check California's official guidance to find out whether you can request an initial inspection before move-out. Rules vary by city, so confirm the details with your local authority.
What does "move out inspection" mean?
It is a documented walkthrough comparing a rental's condition to its move-in record. Landlords use it to support any deposit deductions.
Sources
- Appendix 5 Sample Move-In/Move-Out Inspection Form
- Form 17: Moving Out Checklist
- Security Deposit - Rent Stabilization Department
- Moving out checklist | Ohio Legal Help
- Sec. 504B.182 MN Statutes